
I have a childhood memory related to roof tiles. Some cousins and I played cricket in my grandparents’ yard, and often a spirited shot left the ball stuck on the low-pitched, clay-tile roof of their house. We sneakily climbed on the roof to retrieve the ball, and nearly every time, our grandma would yell from inside, ‘Hey, get off the roof now, you’ll break the tiles!’ Well, I’d be lying if I said we never broke any tiles.
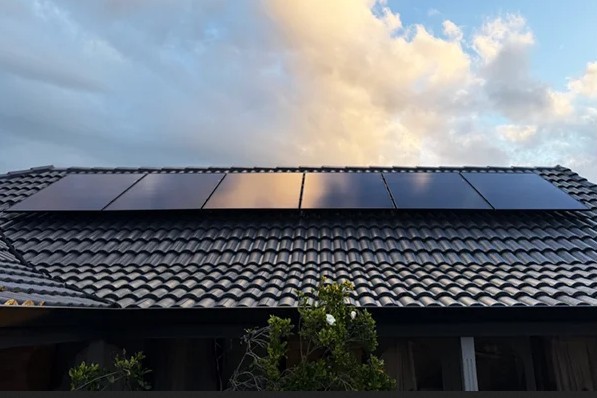
As a result, I feel extremely uncomfortable at the thought of a solar technician walking on a tiled roof with a 20+ kg solar panel. Thankfully, after millions of solar power systems installed over multiple decades, the industry has learnt to handle tiled roofs. So, to answer the question, yes, you can install solar on tiled roofs. But not all roofs are made equal!
Keep reading to know the implications of having a tiled roof, the process of installing solar on tiles, and why the type of tiles is also a major factor to consider.
Tiled Roofs Vs Other Roofs
Here in New Zealand, it is common knowledge that tiled roofs are the minority. Most modern roofs are made of sheet metal, and installing solar on them is pretty straightforward. An installer will clamp L-feet or S-clamps down into the roof’s rafters and install rails on them.
 Installing solar on a sheet metal roof (source: New Zealand Metal Roofing Manufacturers Association)
While the core method remains the same with tiled roofs, certain challenges emerge. For example, tiled roofs are prone to breaking (I can see my grandma nodding). Some tiles may also need a little modification for the clamp to fit snugly under them (more on this later).
Overall, it is more complex to install solar panels on tiled roofs, and therefore, also more expensive. That said, the kind of tiles you have on your roof is a bigger question than whether you have tiles instead of a conventional roof. But before we move on to that, a quick description of how solar is installed on roof tiles.
How Solar Panels are Installed on Tiled Roofs
Below are some graphics (source: Solar Parts and Components) showing key steps in installing solar panels on concrete (or clay) tiles:
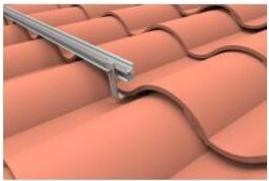
1. Installing the hook:

The installer removes a tile and fixes a clamp directly to the roof’s rafter or purlin. They then install a metal flashing and use a generous amount of sealant to make sure water does not leak through.
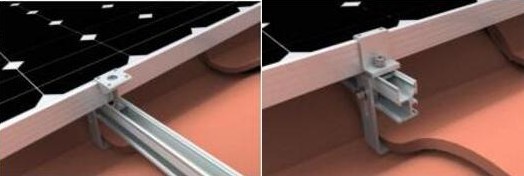
The tile is then placed back in its place. In most cases, the tile won’t fit snugly due to the clamp’s thickness, and will probably look like it is halfway through a squat.
To solve this problem, most installers will chip away a tiny piece of your tile, making space for the clamp to sit there. Some installers may just go with a chisel and hammer, while others may use a hand grinder. While the latter is a safer method that offers more precision, it does not matter as long as the tile looks even from a distance (and isn’t broken elsewhere, of course).
2. Installing the rails:
Once the tile is back in place, the technician will install the racking rails on the clamps. This step is the same for any roof, and does not require any special attention or procedure other than being careful when walking around on the tiles.
3. Installing the panels:
Lastly comes the installation of solar panels on the rails. The panels will have mid-clamps between each other for securing them to the rails and end clamps on the last panels in every string/row.
This, too, is a pretty straightforward step; the only additional care required is when walking with the additional weight of the panels. The technicians will avoid walking on the tiles that house the clamps under them, as the narrow metal clamps may possibly crack the tile sitting on top.
Tile types
And now, a little overview of how the type of tiles matters more than whether you have tiles or sheets on your home. We will look at each tile type separately from a solar perspective.
Concrete Tile Roofs
Among tiled-roof homes in New Zealand, concrete tiles are perhaps the most widely used option. They are durable, sometimes lasting an entire generation, and can take a decent amount of weight.
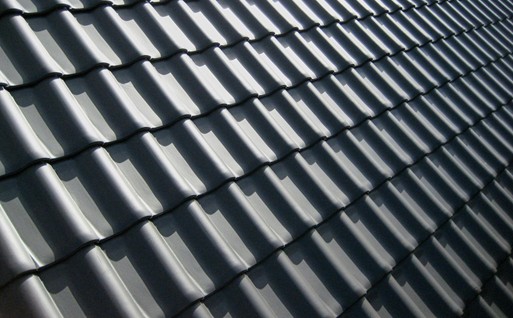
Concrete roof tiles (source: Unsplash)
Solar installers are not particularly scared of walking on concrete tiles. And although it takes a little longer to install on concrete tiles than sheet metal or shingles, most installers will be happy to take the job.
Clay/Terracotta Tile Roofs
Some 12,000 years ago, the Chinese invented clay tiles. Also known sometimes as terracotta, these tiles have been so reliable for so long that many homes still have them. Unfortunately, they are also quite brittle, and working on them is tricky, which is why even the most seasoned installers shy away from them.
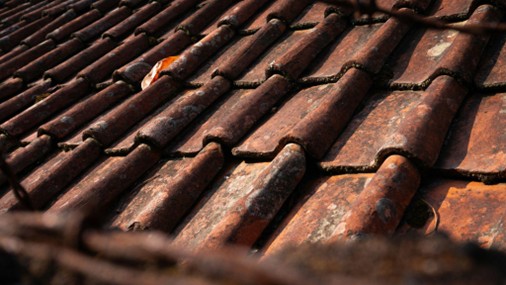
Very old clay-tiled roofs are usually a no-go for solar (source: Unsplash)
The process of installing solar on a clay-tiled roof is the same as a concrete-tiled roof. However, clay tiles are more prone to breaking, and the care required when treading on them is multifold. And no matter how careful they are, installers know they will certainly break a few tiles.
This is why a vast majority of installers will choose not to install on clay-tiled roofs. Those who dare to work on them will ask you to have spare tiles at hand. Speaking of spare tiles, installers usually request spare tiles even when working on concrete tiles. For older roofs that may not have similar tiles available, installers may choose to have different-looking tiles and install them under the panels so they remain hidden from view.
In the worst case of having none or very limited spare tiles, installers can use a roofing sealant to repair cracked tiles, although there won’t be much hope for a severely damaged tile.
Slate Roofs
The case with slate roofs is more or less the same as that of clay. Slate is a premium, heritage-style roofing material that is also brittle. On top of that, it is also more expensive than clay or concrete tiles. Installers will therefore avoid installing on slate roofs, or quote a higher price and a longer timeframe.
Alternative Methods
In some countries, a common method of installing solar on tiled roofs is using ‘comp tiles’, AKA composite shingles, instead of existing tiles under the panels. The technician will swap out the clay or concrete tile where the clamps are with a composite shingle. However, some installers think this is not a perfect method, as it creates a possibility of leakage between the two different tile types if the work isn’t done precisely.
Some companies now offer tile replacement mounts, which use the same principle as the above-mentioned ‘comp-out’ method, but use a near-identical fake tile instead of a comp shingle. Check out the image below, which has a neat, tile-like mount that houses an airtight recess for the clamp to go through. However, this option is relatively new and has limited availability in New Zealand.
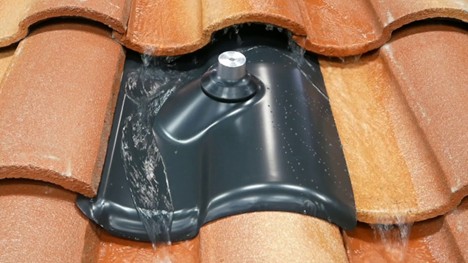 A Pegasus tile replacement mount
Summing It Up
Most of us will agree on the fact that tiled roofs look better, perhaps for the nostalgia they generate. They are also, in some ways, more durable, making them a great option for a home. However, installing solar panels on tiles poses a challenge, because people who invented tiles many centuries ago obviously never thought of a thing called solar panels.
Fortunately, installers have learnt how to successfully install panels on tiled roofs. That said, clay-tiled roofs are more challenging than concrete-tiled roofs, and some installers will refuse to install on them. If an installer does agree to install on a tiled roof, they will probably charge you more, owing to the extra time and (possibly) material requirements. But if you live in an area with good solar potential and have a good roof orientation, the added cost may still be worth it.
If you have a clay-tiled roof and plenty of open, shade-free space around your house, you may also consider getting a ground-mounted system. If you do plan to install on your roof tiles, make sure you have plenty of spare tiles, and that you choose an installer with relevant experience.
Post your own comment